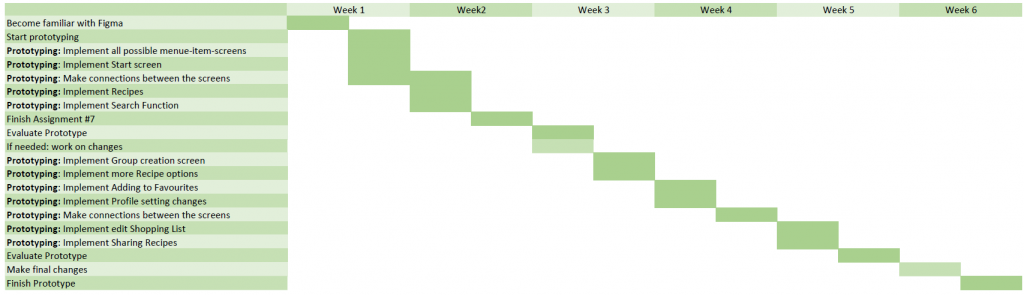
Continue to improve your high-fidelity prototype
We finished our onboarding on Flutter and started to design concrete Screens. We already have reusable Widgets that will accelerate the development process but some Screens are still work in progress. The planning was made before having a concrete idea of how things should be done in Flutter so we will use the time of preparing „Dummy Data“(the plan was to store data in JSON files) to finish the screens since we already created dummy data inside Dart objects.
Conduct the first and second phases of a heuristic evaluation
Phase 1: Preparation
We have exchanged Tasks with Group8. We prepared the tasks we received as starting point for the evaluation
Tasks for the evaluators
-In der echten App fängt der User mit 0 Zutaten an . Zur Testvereinfachung, wurden schon Zutaten hinzugefügt.
-Finde heraus welche Zutaten du schon hast?
-Was ist das letzte Rezept das gekocht wurde ?
-Wie wurdest du einen Rezeptvorschlag bekommen ?
-Wähle das Vorgeschlagene Rezept -Bestätige dass du das vorgeschlagene Rezept gekocht hast
-Was ist das letzte Rezept das du gekocht hast ?
-Welche zutaten hast du übrig nachdem du gekocht hast ?
-Füge 2 Baguette zu HelloFridge Topf
We used the following form template for the evaluation process
https://docs.google.com/forms/d/1CtM835Rphnc312GX8F15cvzG1dIpIFrA3T9vDYXlV7o/edit
Screenshots
Mouadh used Monosnap to easily take screenshots and copy the link. Christian uploaded the images in Google drive and posted the links.
Phase 2: Evaluation
The given resource(https://www.nngroup.com/articles/ten-usability-heuristics/) helped us to have the Nielsen’s heuristics listed in a compact page where we can easily extract the violated heuristics from the prototype.
Summary of our evaluation processes
The tasks that we received presented a good starting point to understand the prototype. We decided to not play with the prototype until we accomplish all the tasks in order to keep the mind of a completely fresh user.
We took one hour to separately evaluate the prototype using the mentioned Google Doc. Concretely, each team member followed the tasks and added the detected violation.
Parallelly, we wrote down some unclarities that we couldn’t clearly associate with heuristics violations. Afterwards, we discussed the extracted violations and discussed the ambiguous ones in order to classify them.
Who did what?
We prepared the tasks together and then met another day to solve the assignment questions. We prepared the evaluation together then evaluated the prototype individually. Afterwards we met again to discuss our evaluation results.
What have we learned?
Nielsen’s Heuristics were eye openers, not only as we evaluated the other group’s prototype but also made us conscious about the violations that our prototype has.
What went well?
Communication was smooth. We are organized since we have fixed times reserved for solving the assignment.
What do we want to improve?
We are happy with our process and results.