When dealing with virtualization software (i.e. VirtualBox) it is important to familiarize oneself with some fundamental terms:
- host: This is the operating system of the physical computer which you use every day
- guest: This is the new operating system that is running inside the VirtualBox Software
- Virtual Machine (VM): This is the environment that VirtualBox creates for your guest operating system while it is actively running
In order to use our VM, you need a desktop PC or laptop that meets the following minimum requirements:reseda
- 64-bit (x64) processor
- minimum of 8 GB system memory (RAM)
- at least 20 GB of available space on your hard drive
- internet access
1. Install VirtualBox software and its extension
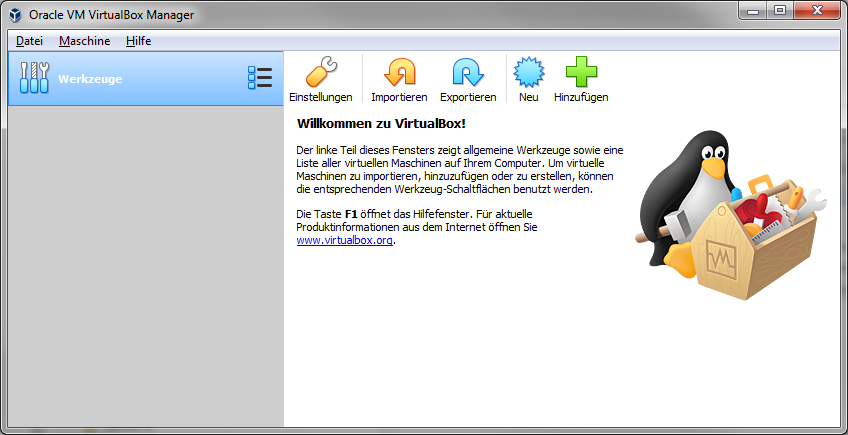
Download the Oracle VirtualBox software (version 6.0.10). Choose one of the following download links depending on your host operating system: Windows, Mac OS, Linux distros, or Solaris. Start the installation wizard and confirm all prompted installation requests. After installation is completed, start your VirtualBox software:
The default language of the VirtualBox Software depends on your system language. Anyway, you can easily switch to English: Open the VirtualBox preferences by pressing Ctrl+g on your keyboard while your VirtualBox progam is active (or by left mouse click on File in the upper left corner, and then Preferences). Search the language tab and choose English:

Now, download the Oracle VM VirtualBox Extension Pack version 6.0.10 via this link. This extension pack adds some functionality to the VirtualBox base package, e.g., support for USB Controllers and NVMe SSDs. In order to install the extension pack open the preferences (Ctrl+g), search the Extentions tab and click the small icon with the plus on the right side of the window. Browse to your extension pack in the file explorer and confirm all prompted installation requests. You should see the extensions when this installation was successful:

You are free to delete the installation files for VirtualBox and its extension now.
2. Install your VM image
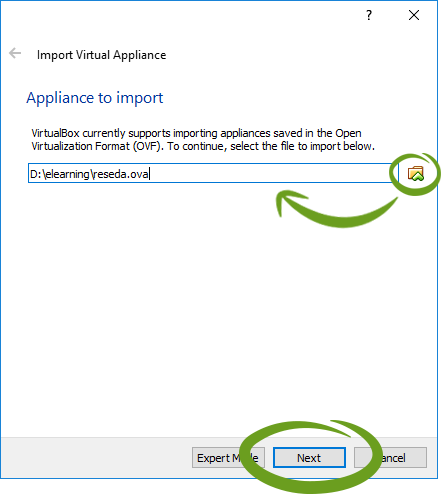
The RESEDA VM image was uploaded as an appliance (reseda.ova) to the FU Berlin Blackboard website and can be downloaded via this link. Bring along some patience, as this file is quite large (approximately 4 gb). After the download has completed, press Ctrl+i (or by left mouse click on File, and then Import Appliance) in order to open the Import Appliance window. Click on the folder icon and browse to the downloaded VirtualBox image file from step 1 (“reseda.ova”). Confirm by pressing Next:
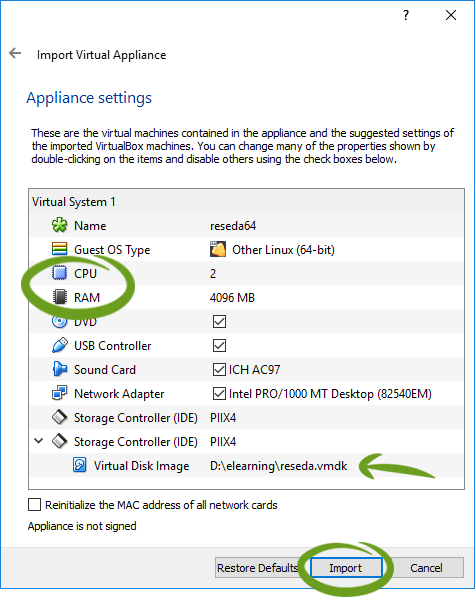
The next window shows the default appliance settings for our VM. You can apply all necessary changes here, depending on your host system (you can also change those settings later). Adjustments of the following options should be made:
- CPU: if your host system is a multi-core processor with more than four cores (e.g., hexacore, octacore), assign approximately 75% of them to your VM. More computing power allows users to work more naturally and efficiently
- RAM: This also applies to your RAM: if you have more than 8 GB of RAM, assign approximately 75% of its capacity to your VM
- Storage Controller > Virtual Disk Image: This is where you want to save your VM. It is not recommended to put this file on slow external storage devices (e.g., USB flash disk), as this usually slows things down. Change the path to your choosing, and name the file “reseda64.vmdk”. For example “D:\elearning\reseda64.vmdk” as shown in this image:
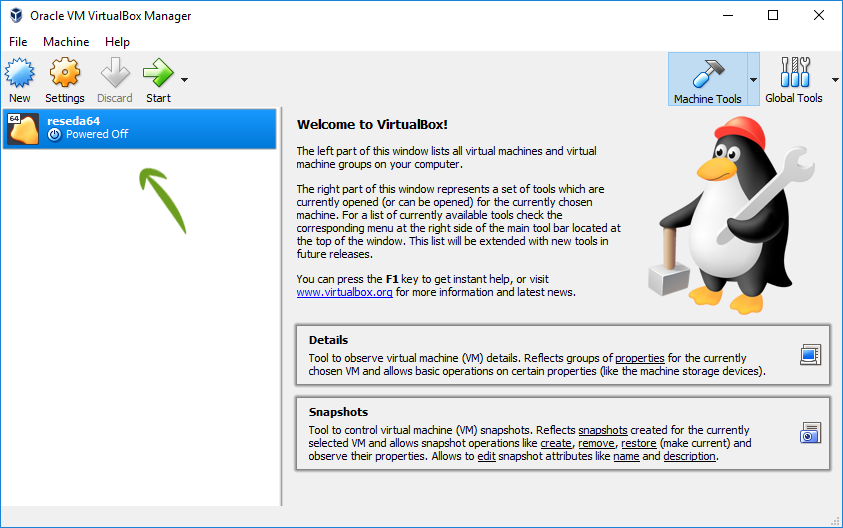
Then click Import. After a few moments, the imported VM is listed in the Oracle VM VirtualBox Manager, as shown below:
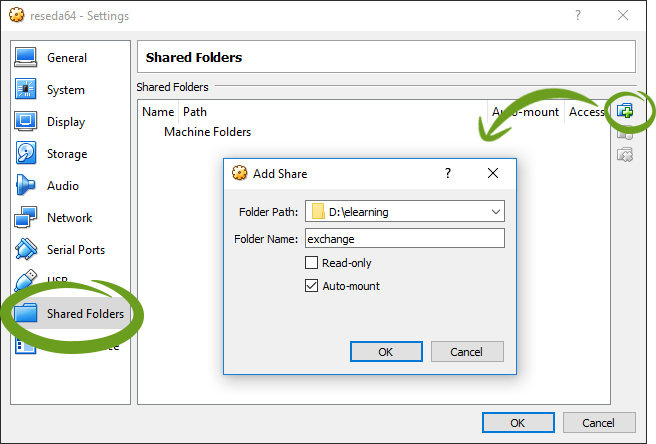
One last thing: Press Ctrl+s (or by right mouse click on reseda64, and then Settings…) in order to open the settings of the reseda VM. In this menu you could revise your settings on allocated RAM, CPU or graphical video memory. Anyway, you need to define a folder, which serves as communication gateway between your host and your RESEDA guest operating system. This folder should be your main working directory from now on. Therefore, search Shared Folder in the left menu bar and click on the small icon showing the green plus symbol. Use the dropdown menu to navigate to a directory of your choice (Folder Path). Use “exchange” as the Folder Name. Tick Auto-mount and then confirm by pressing OK:
Close the settings by clicking OK and start your VM by pressing the start button (marked by a big green arrow) in the VirtualBox Manager. Usually it takes just a few seconds for the RESEDA working environment to boot in a new window. The screen resolution of your RESEDA VM will resize dynamically each time you modify its window size. Alternatively you can use the full screen mode by pressing View and Full-screen Mode.
Your predefined user name is “student” and your password is “reseda“.
Congratulations, you are ready to get started!
Feel free to delete the reseda.ova file, as you no longer need it (except for backup purposes, maybe). Your actual VM file (reseda64.vmdk) should be about 8.5 GB. Keep in mind: the storage of this VM is dynamically allocated, which means that it may become bigger when you are using it, e.g., if remote sensing imagery is processed, to an absolute maximum of 50 GB.
Windows user should feel comfortable very quickly, as the layout of your RESEDA VM is comparable. There are several shortcuts located in the taskbar linking to all applications we will utilize in this online course:
