You will get to know an online platform that lets you search and download Landsat 8 data – the USGS EarthExplorer. You need dozens of images? – No problem! Have a look at the section for bulk and BIG DATA downloading and do not forget to test your knowledge at the end of this section!
Section in a Box
In this section, the following content awaits you:
1 USGS EarthExplorer User Interface
– visiting USGS EarthExplorer for the first time
2 Registration
– do a registration in order to be allowed to download products
3 Perform a Search
– create a search query to get products from the database
4 Download a Dataset
– download Landsat Level 1 and Level 2 products
EXERCISE
1 USGS EarthExplorer User Interface
The EarthExplorer supports online search in comprehensive databases, quicklook visualizations, metadata export, and data download for earth science data from the archives of the U.S.Geological Survey (USGS). You get to the USGS EarthExplorer via the following URL using any web browser (Firefox in our RESEDA VM):
https://earthexplorer.usgs.gov/
Once clicked, the main EarthExplorer graphical user interface (GUI) should be loaded, which is composed of three key elements:
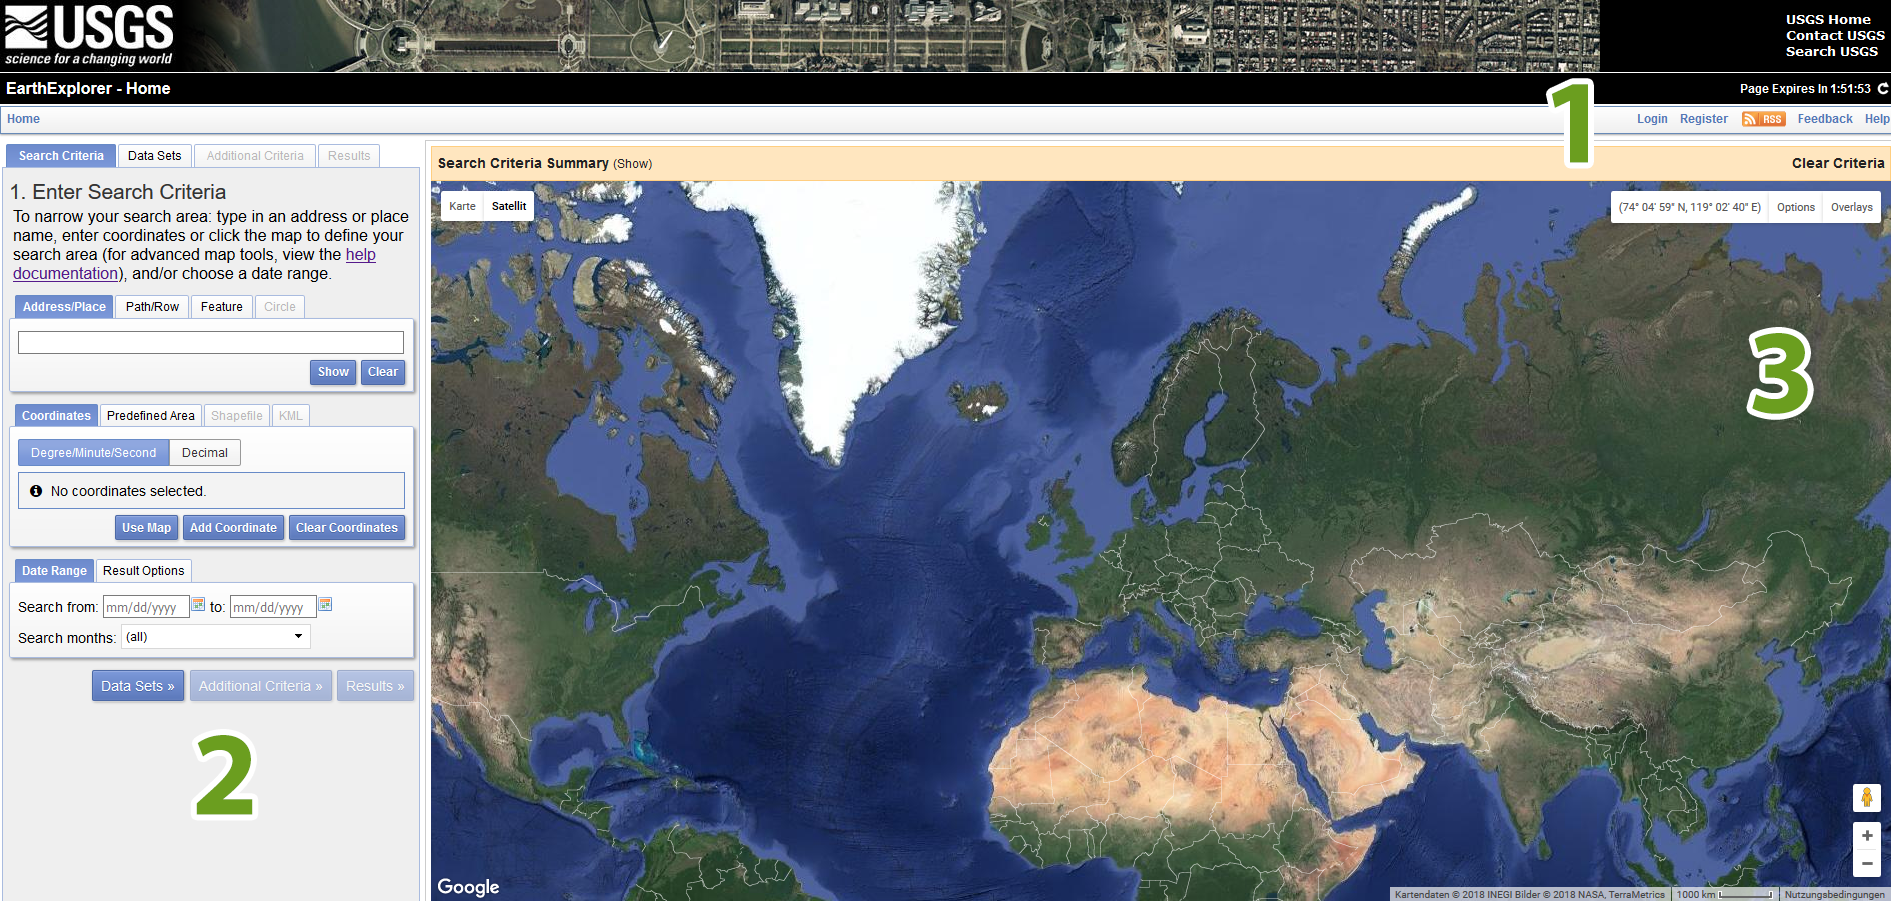
- 1 Header Menu Bar: Buttons for login and registration services, as well as help, RSS and feedback functionalities. After login you can save and load queries here
- 2 Data Search Side Bar: Search components are divided among four tabs and allow you to enter search criteria, select datasets to query, enter additional criteria, and review results in a tabular window
- 3 Image View with Navigation Elements: embedded Google Maps components to visualize search results, with standard Google Maps navigation tools, i.e., zoom in/ zoom out, street view (lower right corner), and coordinate information of current cursor position (upper right corner). You can toggle between satellite imagery view and GIS data view by selecting the adequate button in the top left corner
2 Registration
First of all, to fully use the services of the EarthExplorer, you need to register by clicking on the register button in the header menu bar and proceed through the user registration. Only registered users can download data. You definitely need a working email address for this. The information gathered from the registration process is not distributed to other organizations and is only used to determine trends in data usage. You have to work through a user affiliation/data usage and address page:
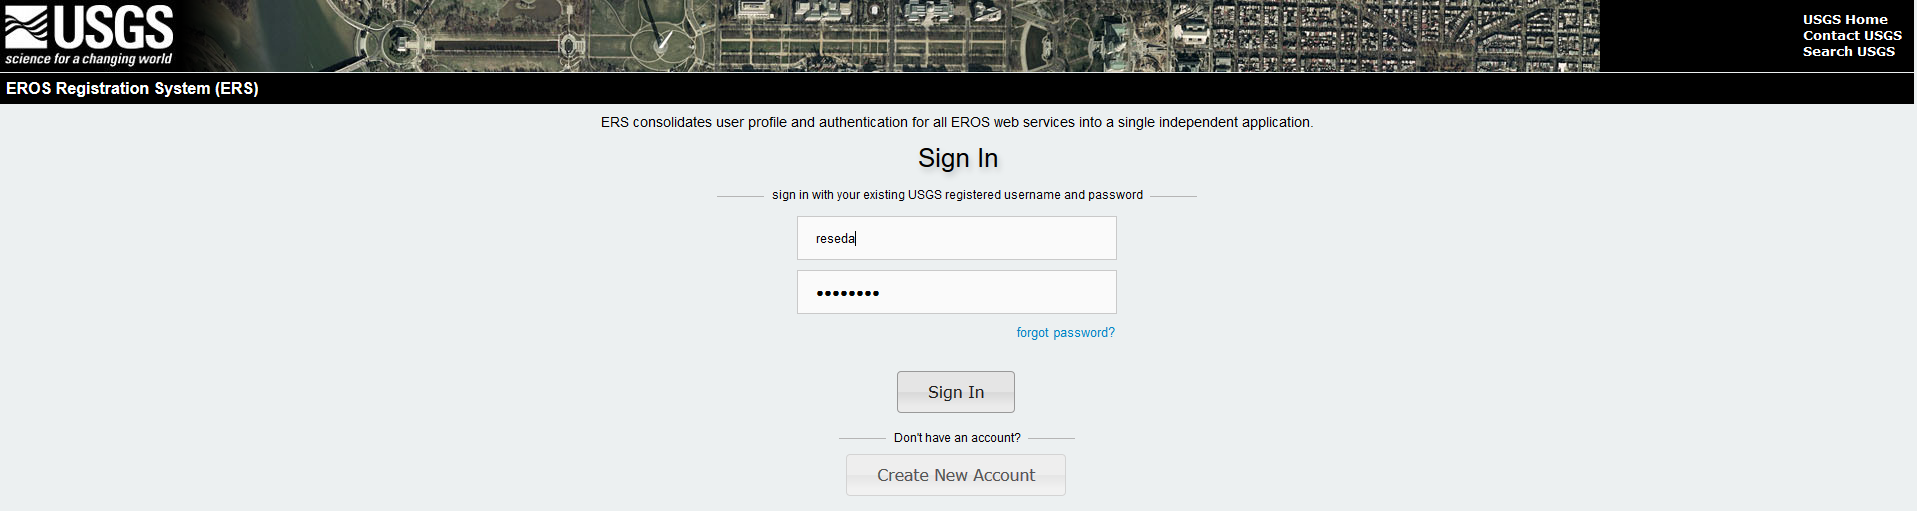
Once you have completed the registration, you should get an email on your given email address to confirm your account. After confirmation you will be redirected to the login page where you have to fill in your username and password (or click on “login” in the header menu bar).
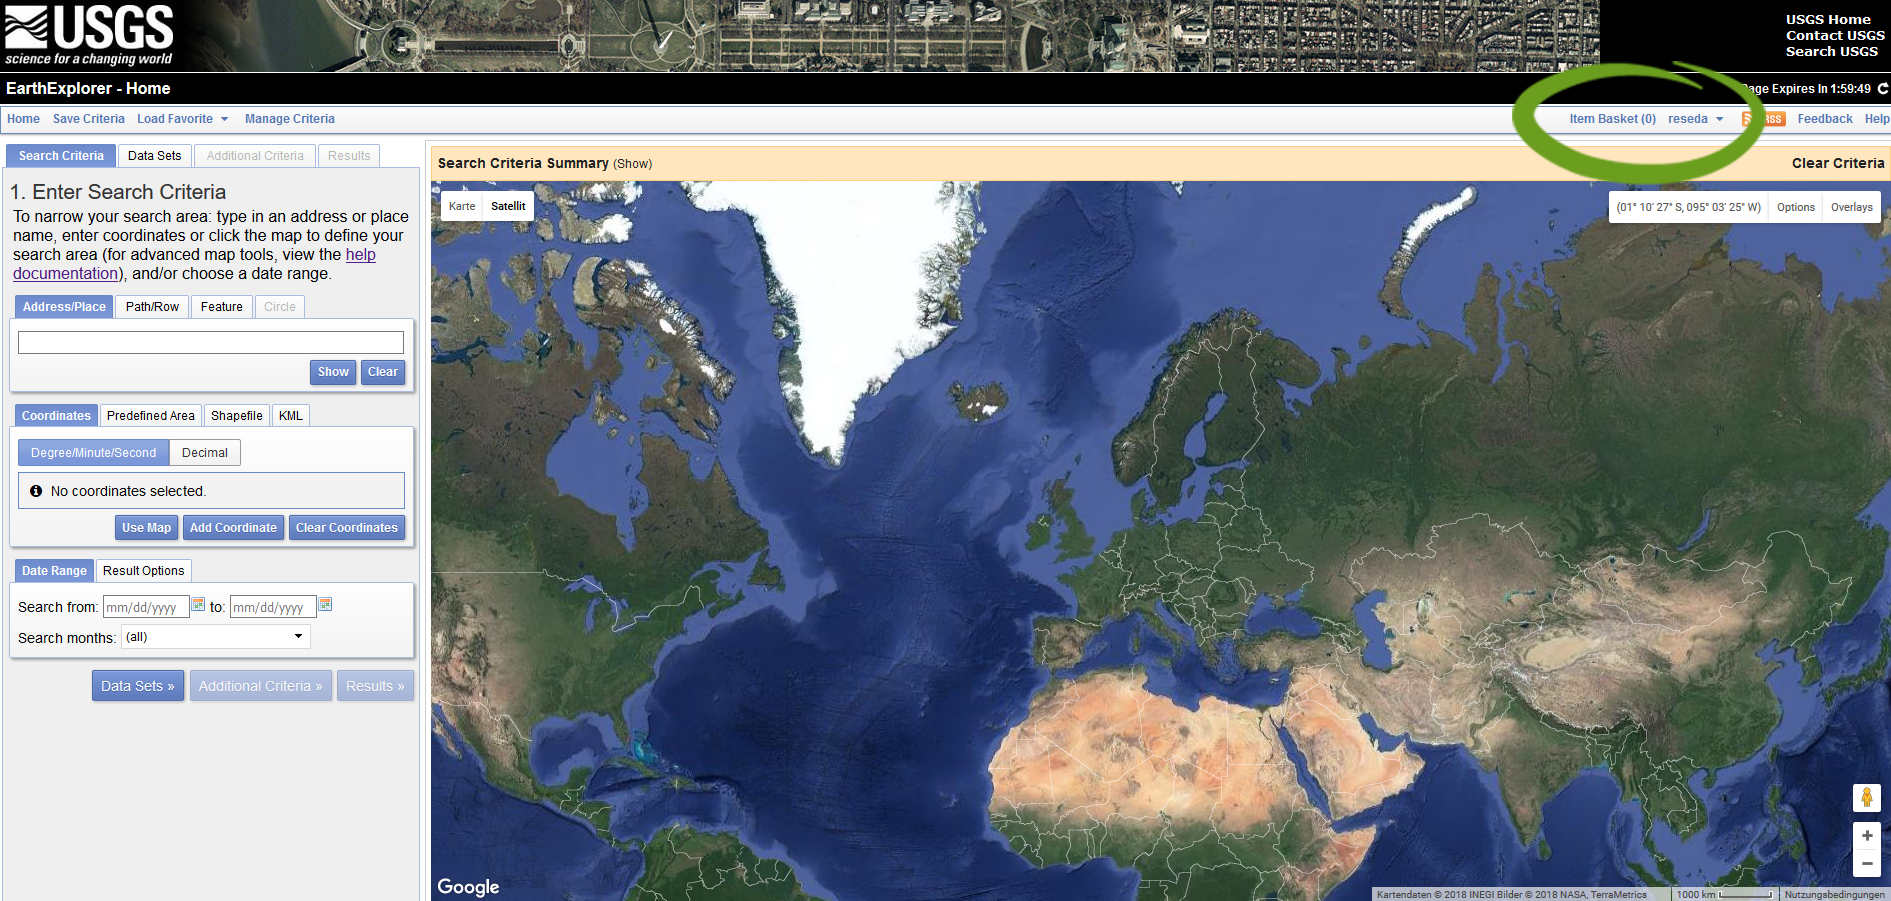
After login you will notice your username and your “shopping”/ item basked in the header menu bar:
3 Perform a Search
We want to use an example to explore the search function of the EarthExplorer: We are looking for all Landsat 8 scenes that depict Berlin in summer 2017 and have a cloud cover of less than 10 %!
EarthExplorer provides four tabs in the search procedure to guide you through your search request:

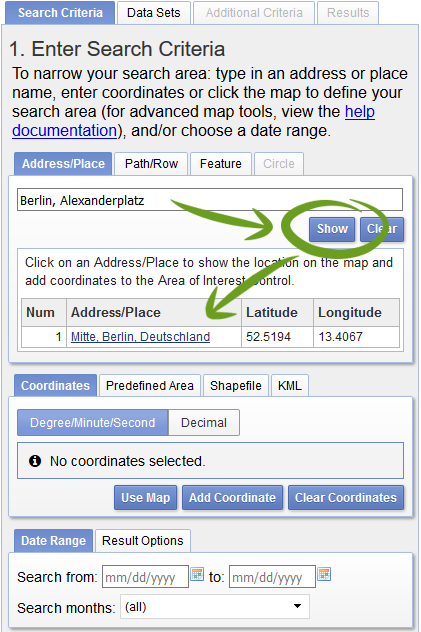
1. Enter Search Criteria: This one helps defining an area of interest (AOI) and a time span in which data will be found. The most straightforward way to define the AOI is to use the integrated Google Maps by typing in an address or place name, e.g., “Berlin, Alexanderplatz”, click ![]() and choose one of the prompted suggestions. Designations for geographical longitude and latitude of the desired position are also possible, e.g., “52.5194, 13.4067”.
and choose one of the prompted suggestions. Designations for geographical longitude and latitude of the desired position are also possible, e.g., “52.5194, 13.4067”.
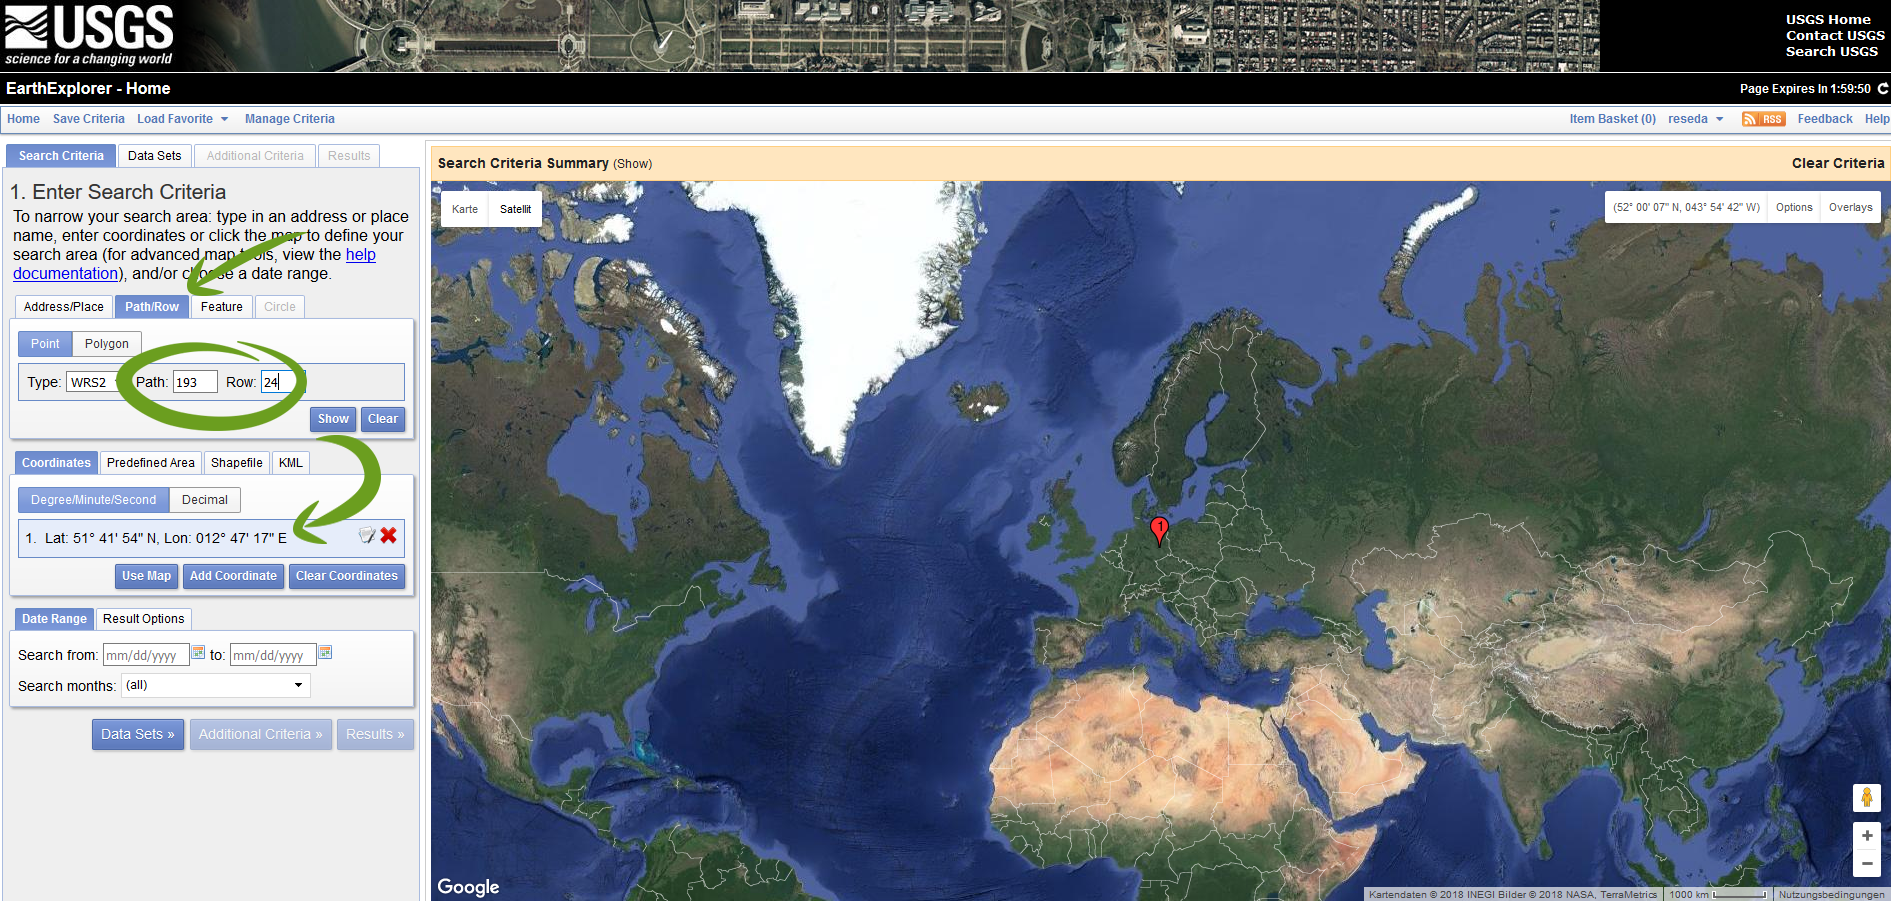
Furthermore there is a global notation used for cataloging Landsat data, called Worldwide Reference System (WRS), whereby Landsat 8 follows the WRS-2. This system divides the Earth’s surface into the recording geometries of the Landsat acquisitions. There are a WRS-2 overview map and a WRS-2 Path/Row to Latitude/Longitude converter provided by the USGS. Especially the converter helps to find all possible Path-Row combinations for your AOI, which is 192/024 and 193/23 in our case for Berlin. Entering one of those Path/Row pairs and click ![]() to add the adequate center of the Landsat acquisition as a coordinate to your Google Map interface:
to add the adequate center of the Landsat acquisition as a coordinate to your Google Map interface:
In order to delete any given coordinate, press the red cross ![]() next to it.
next to it.
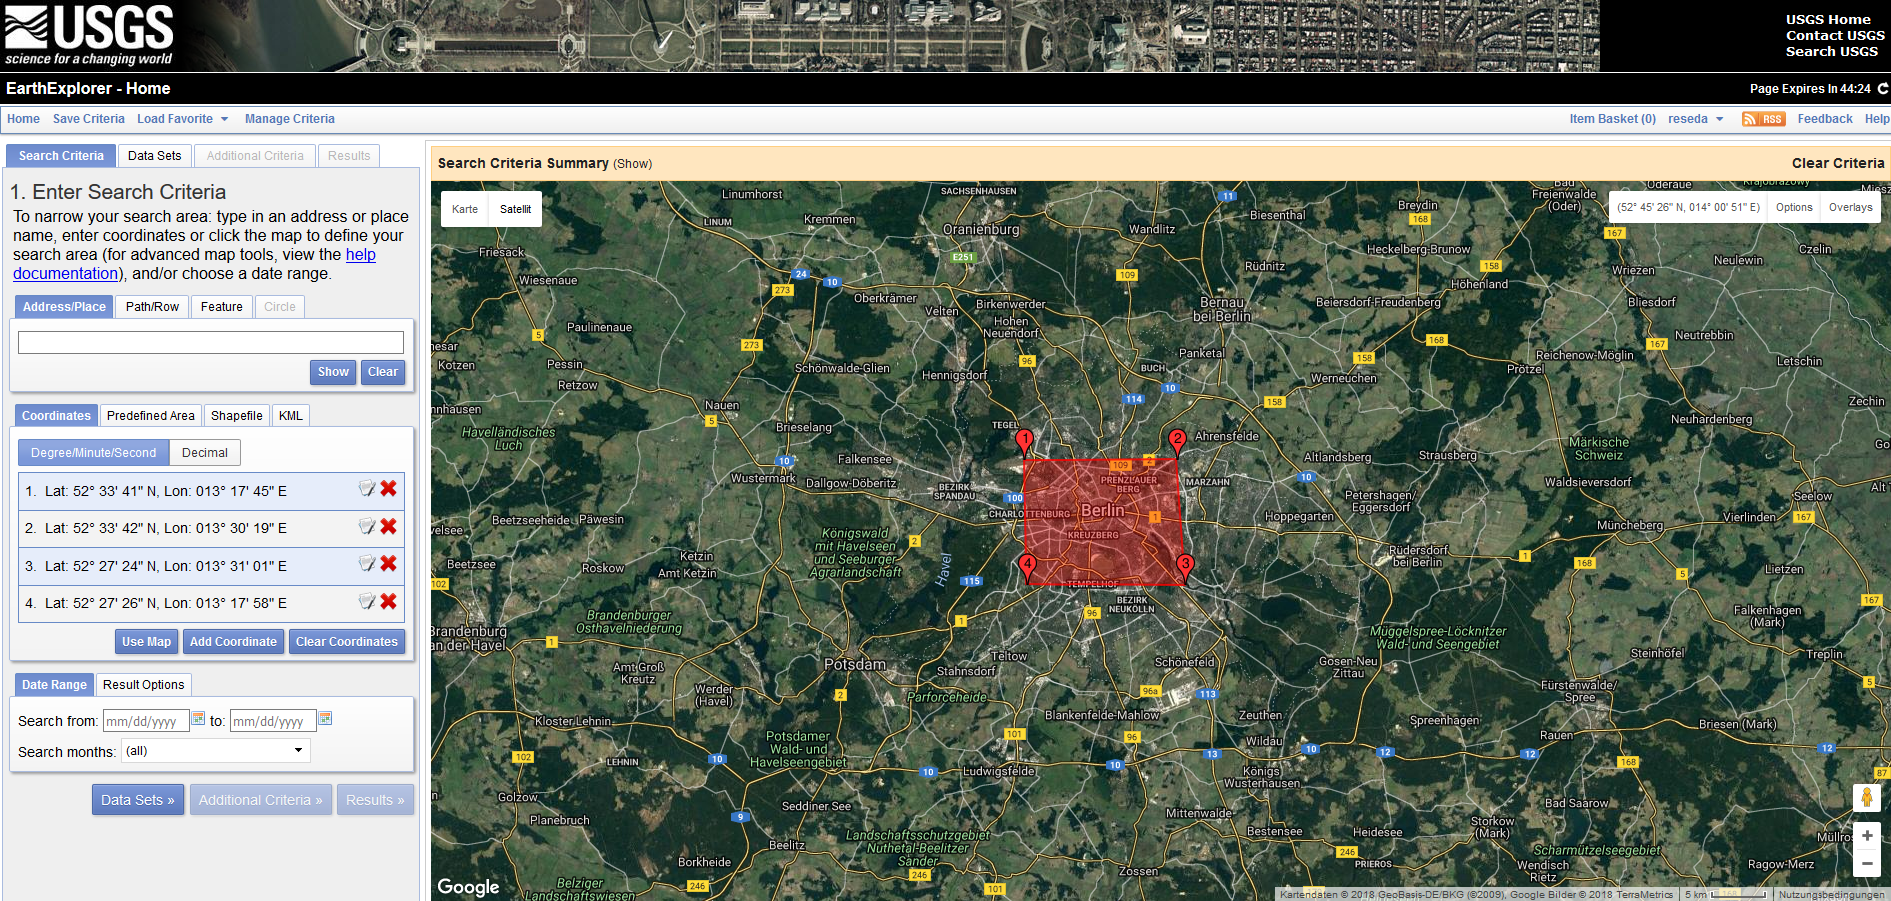
Another easy way to define your AOI is to just left click within the map, which automatically adds a coordinate for a single coordinate search. By defining two points on the map, you will do a line search, which results in all data products which intersects the line. By defining three or more coordinates, a polygon is automatically displayed, forming your AOI:
There are several other ways to define the subject area more precisely, e.g., by shapefiles, features, predefined areas, or kmls, but the methods described are effective and usually sufficient. For more detailed descriptions please have a look at the online help.
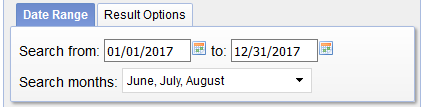
To make your query more concrete, you can define the time span within which you want to get data at the bottom of the Search Criteria tab. Simply set the start date and end date as well as all desired months, in our case june, july and august:
2. Select Your Data Set(s): The Data Set tab categorizes datasets into similar data collections. There is a dynamic tree structure, which allows you to expand/ collapse products by pressing on the plus and minus signs next to it. As you can see, there is a huge amount of data to choose from. Landsat 8 Level-1 data can be found at Landsat > Landsat Collection 1 Level-1 > Landsat 8 OLI/TIRS C1 Level-1:
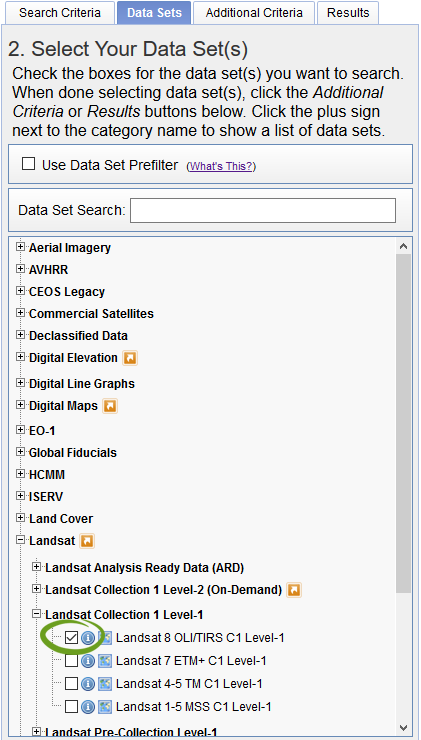
Landsat 8 Level-2 data is also available on demand under Landsat > Landsat Collection 1 Level-2 (On-Demand) > Landsat 8 OLI/TIRS C1 Level-2 (see chapter Landsat 8 for more information).
3. Additional Criteria (Optional): This tab helps to further narrow the results of your search query by defining additional search criteria, e.g., the allowed proportion of cloud cover over land, absolute cloud cover, day or night as well as Path/Row restrictions. In addition, you can use the unique product ID (e.g., LC08_L1TP_192023_20170830_20170914_01_T1) to find specific individual scenes. Restrict the Land Cloud Cover to “Less than 10%” for our query:

4. Search Results: When set, click on ![]() on the bottom of the Data Search Side Bar or the Results tab on the top to execute your research. You will most likely get four data products as a result (depending on the shape of your AOI):
on the bottom of the Data Search Side Bar or the Results tab on the top to execute your research. You will most likely get four data products as a result (depending on the shape of your AOI):
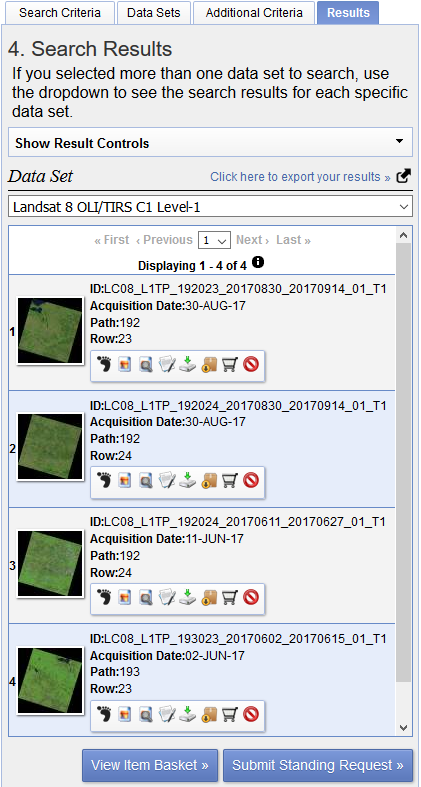
Four scenes are not much, are they? A cloud cover under 10% is already pretty strict, when you allow more cloud coverage, the number of scenes will increases. Each product is given a unique ID, as well as a acquisition time and the WGS-2 Path and Row. Furthermore there is a number of overlay and download controls you can choose from for each scene:
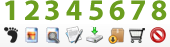
- 1 Show Footprint: display the contour of a scene on Google Map in true color
- 2 Show Browse Overlay: display a preview image of the scene
- 3 Compare Browse: activate this button on multiple scenes, then overlay those here
- 4 Show Metadata and Browse: display the browse image and full metadata for the selected scene
- 5 Download Options: allows registered users to download the selected data
- 6 Add to Bulk Download: allows registered users to bulk download the selected data
- 7 Order Scene: allows registered users to order or request specialized processing of products
- 8 Exclude Scene from Results: delete the particular scene from current result window
4 Download a Dataset
In order to download a single Level-1 scene (see chapter Landsat 8), click on Download Options ![]() and choose the last item, which should be the largest file (approximately 700-900 MB for Landsat 8):
and choose the last item, which should be the largest file (approximately 700-900 MB for Landsat 8):
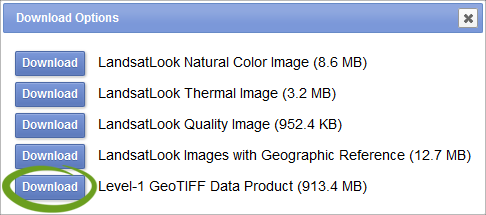
You will recieve a zipped file, which contains all spectral bands as georeferenced geotiff-files.
Anyway, Level-2 products need a preprocessing and are NOT available for immediate download. In order to acquire Level-2 data, pick Landsat Collection 1 Level-2 in the Data Sets tab (as shown in 2. Select Your Data Set(s)). In the Result tab you have to use Order Scene ![]() to put all the wanted scenes in your Item Basket. A number next to your Item Basket shows how many scenes you have chosen:
to put all the wanted scenes in your Item Basket. A number next to your Item Basket shows how many scenes you have chosen:
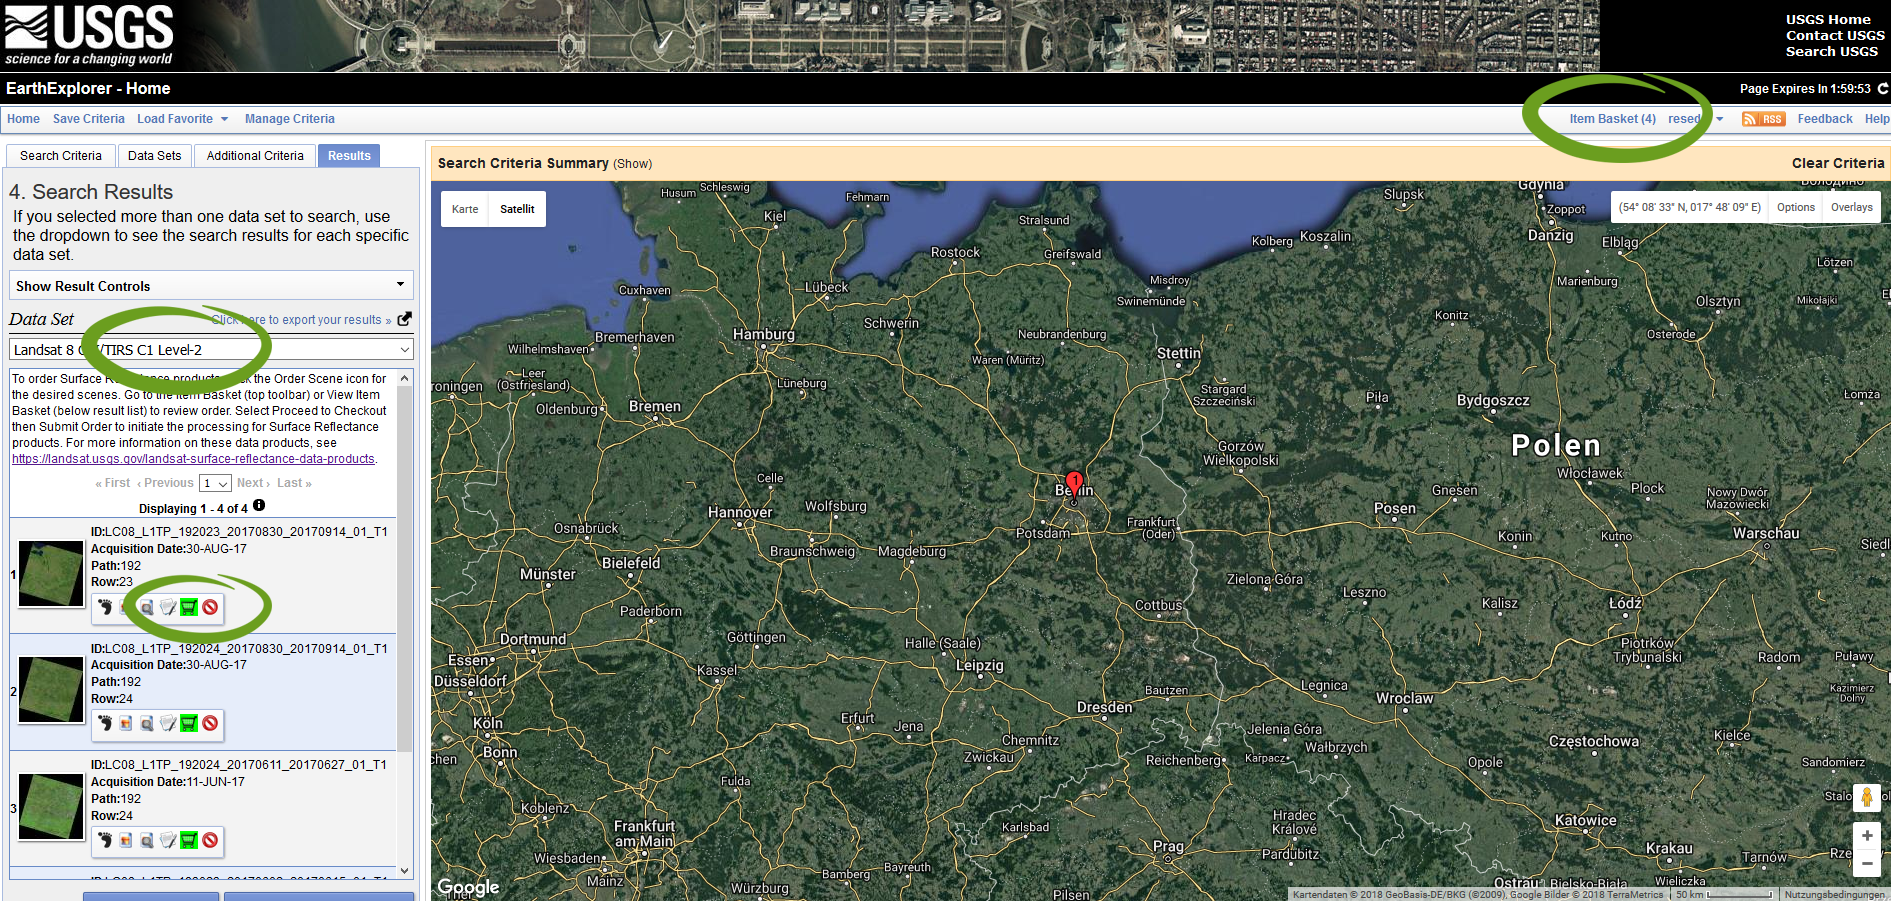
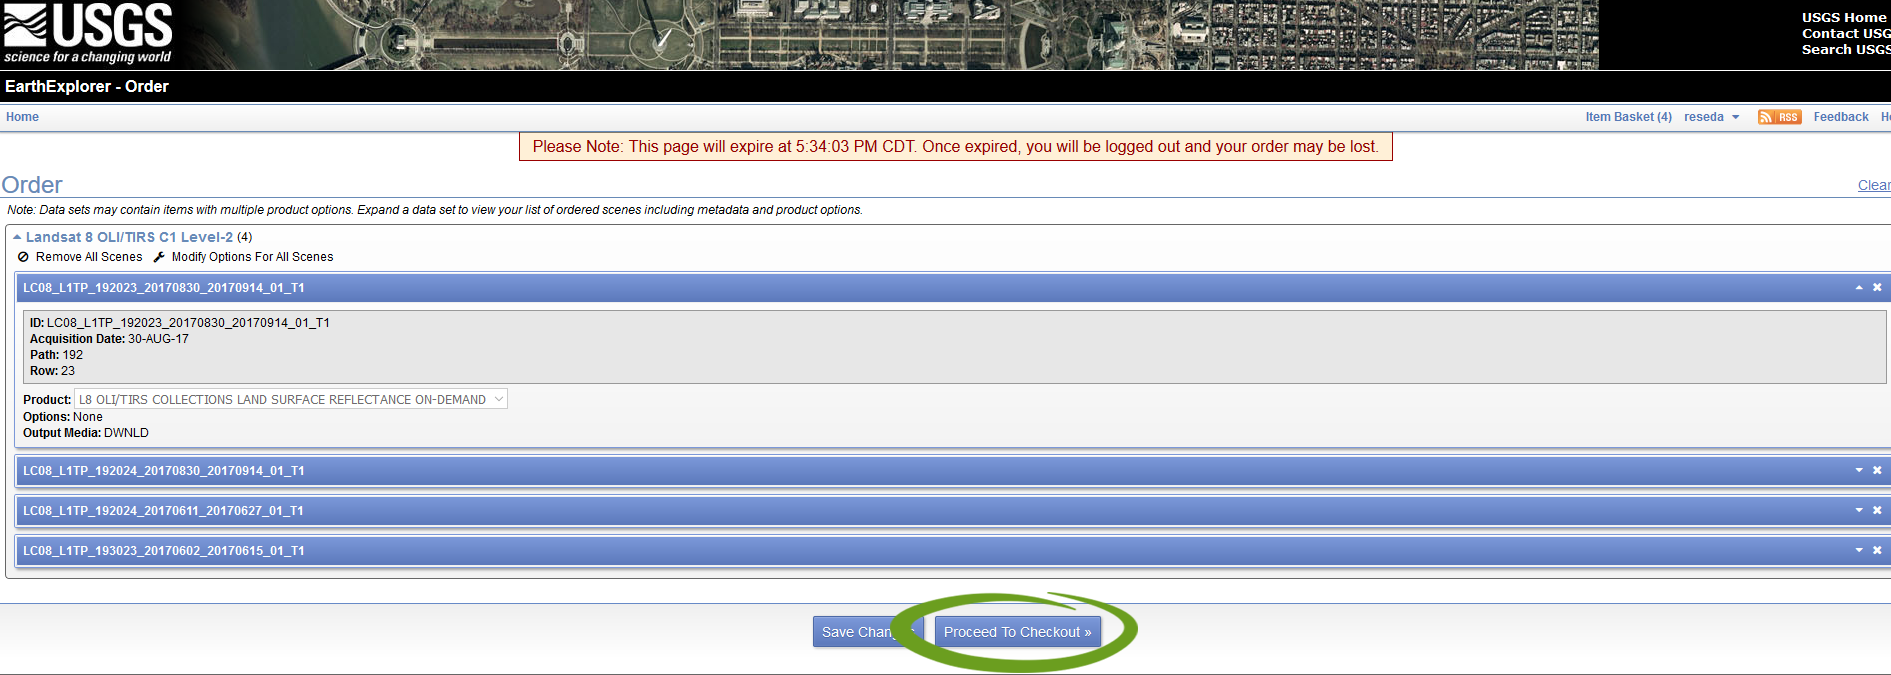
When you are done, click on Item Basket in the Header Menu Bar to submit your order. You will see a list of all selected scenes. Confirm your selection by pressing Proceed To Checkout:
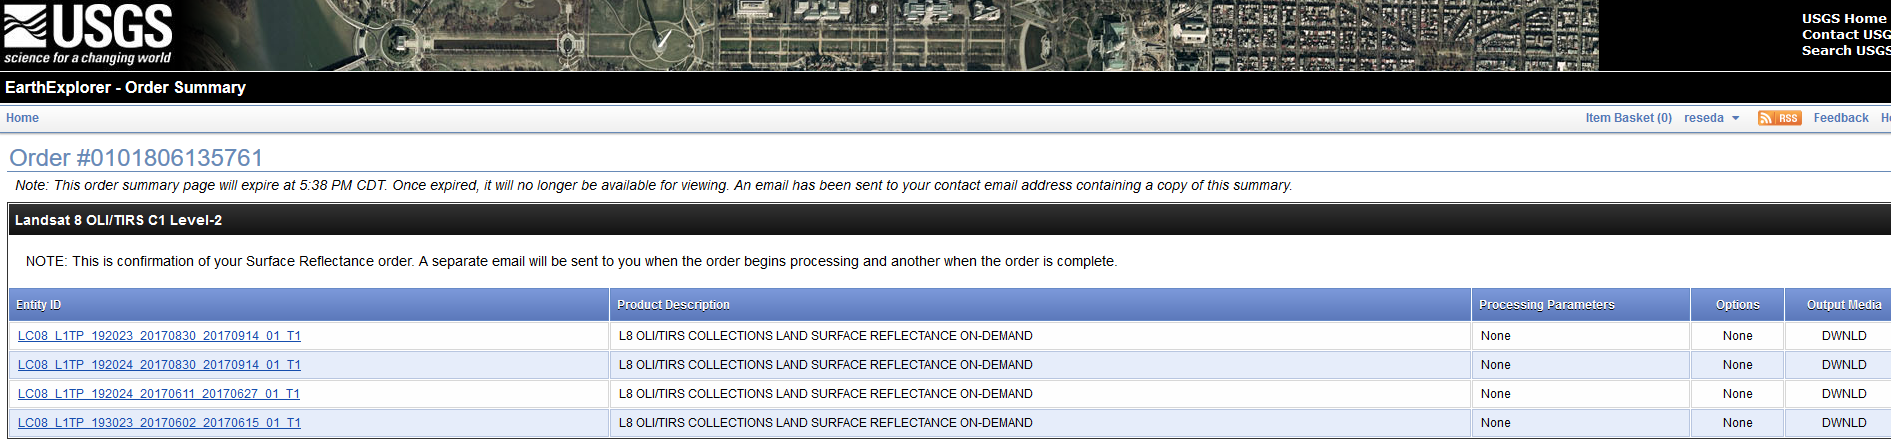
On the next screen, press Submit Order:

DONE! You will be given a unqiue order ID and a confirmation email will be sent to your email address – check in your email inbox!
All Level-2 orders submitted through ESPA are processed within 2-5 days, depending on the size of the order and the backlog already in the system.
Be patient.
A second email confirmation will be send when the products are ready for download. From this moment on, all scenes will remain available for 10 days.
Click on the Order status url in your second confirmation email, which redirects you to the following website:
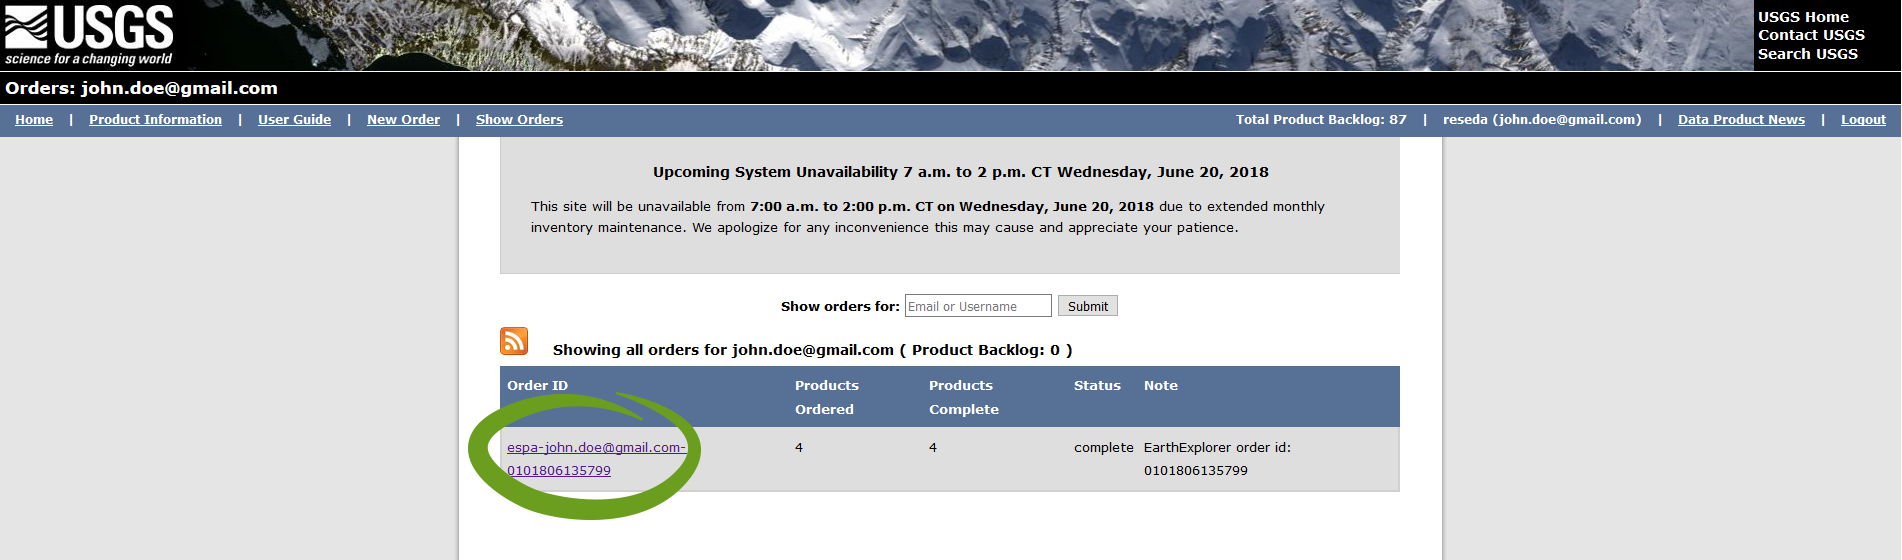
Click on your Order ID, which brings you to the download site. Simply click on the download link in order to get your data:

Follow the search queries in the upcoming exercise to familiarize yourself with how to use the EarthExplorer!